Wpbingo Guide
- Created: 06/05/2017
- Latest update: 06/05/2017
- By: Wpbingo
- Email: [email protected]
- Website: wpbingosite.com
HELLO ! FIRST OF ALL WE WOULD LIKE TO THANK YOU SO MUCH FOR CHOOSING OUR THEME!
This document covers the installation and use of this theme and reveals answers to common problems and
issues - I encourage you to read this document thoroughly if you are
experiencing any difficulties.
Explore our complete collection of premium WordPress Themes and discover more demos,
documentation, and exclusive resources on our website.
Installation
I. Download
Purchase Wpbingo Oritina template from Themeforest then you can download theme package.
Extract Package that include all files and folders of theme.
II. Install via WordPress
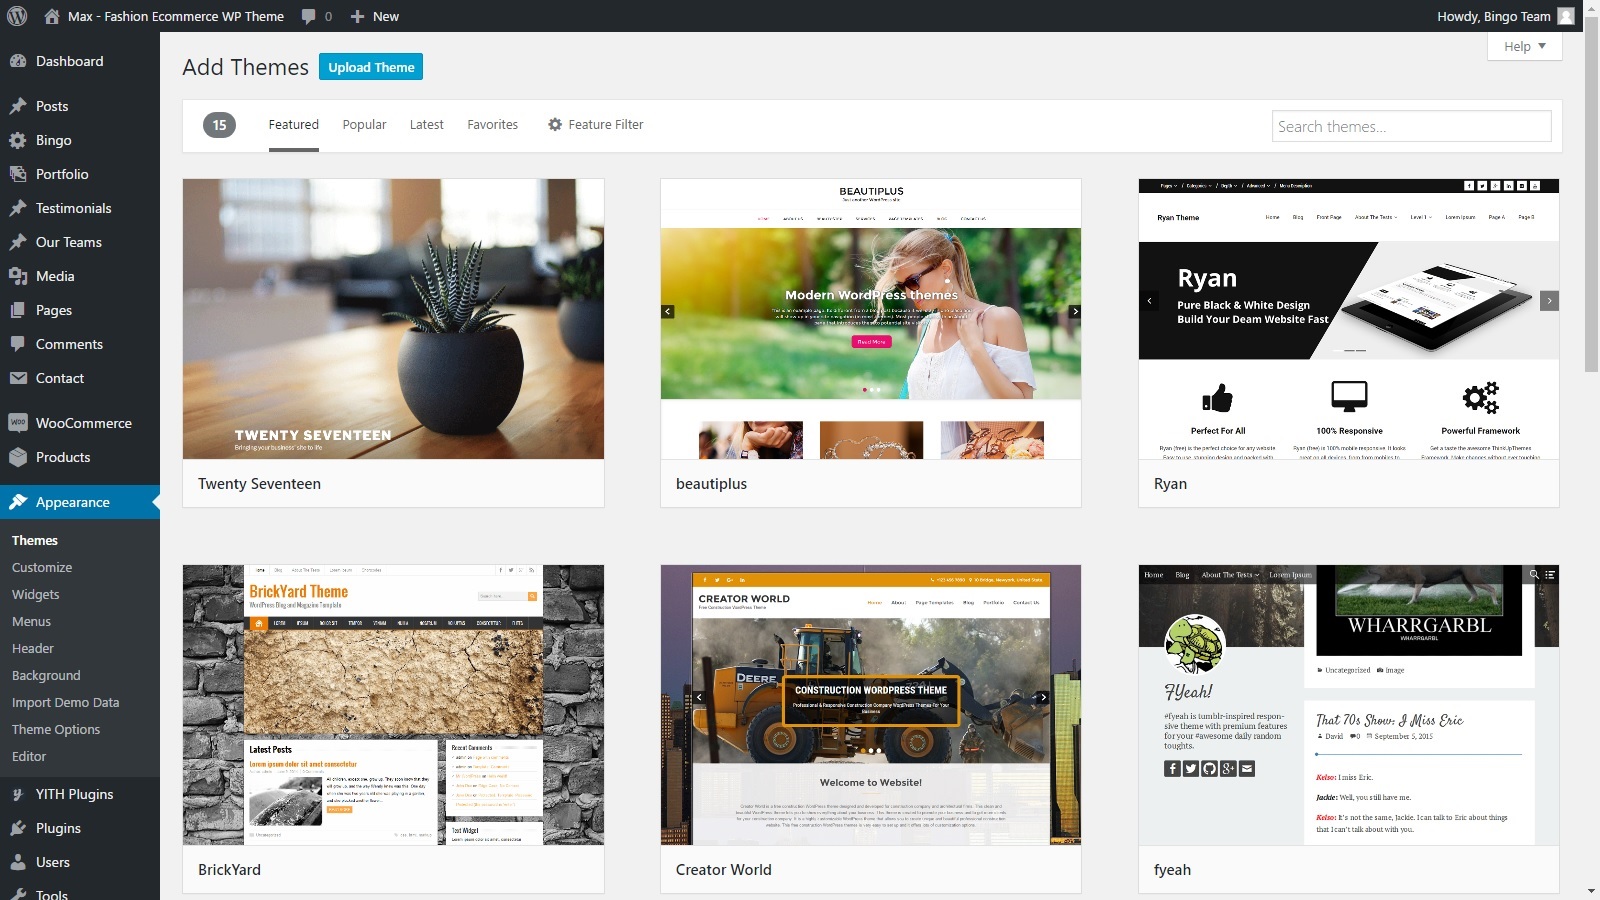
Log in into the admin area, navigate through Appearance > Themes > Add New > Upload Theme and select the .zip file you downloaded and finally click on Install Now
III. Install via FTP
Via FTP – The other way is by FTP, log in into your site’s FTP through a FTP Client and go into the WordPress installation directory and then navigate to:/wp-content/themes/ and upload the Oritina
folder here. After the uplad is complete go to Appearance > Themes into your admin area, you will see Oritina theme there, hit Activate to activate Oritina.
IV. Install Plugins
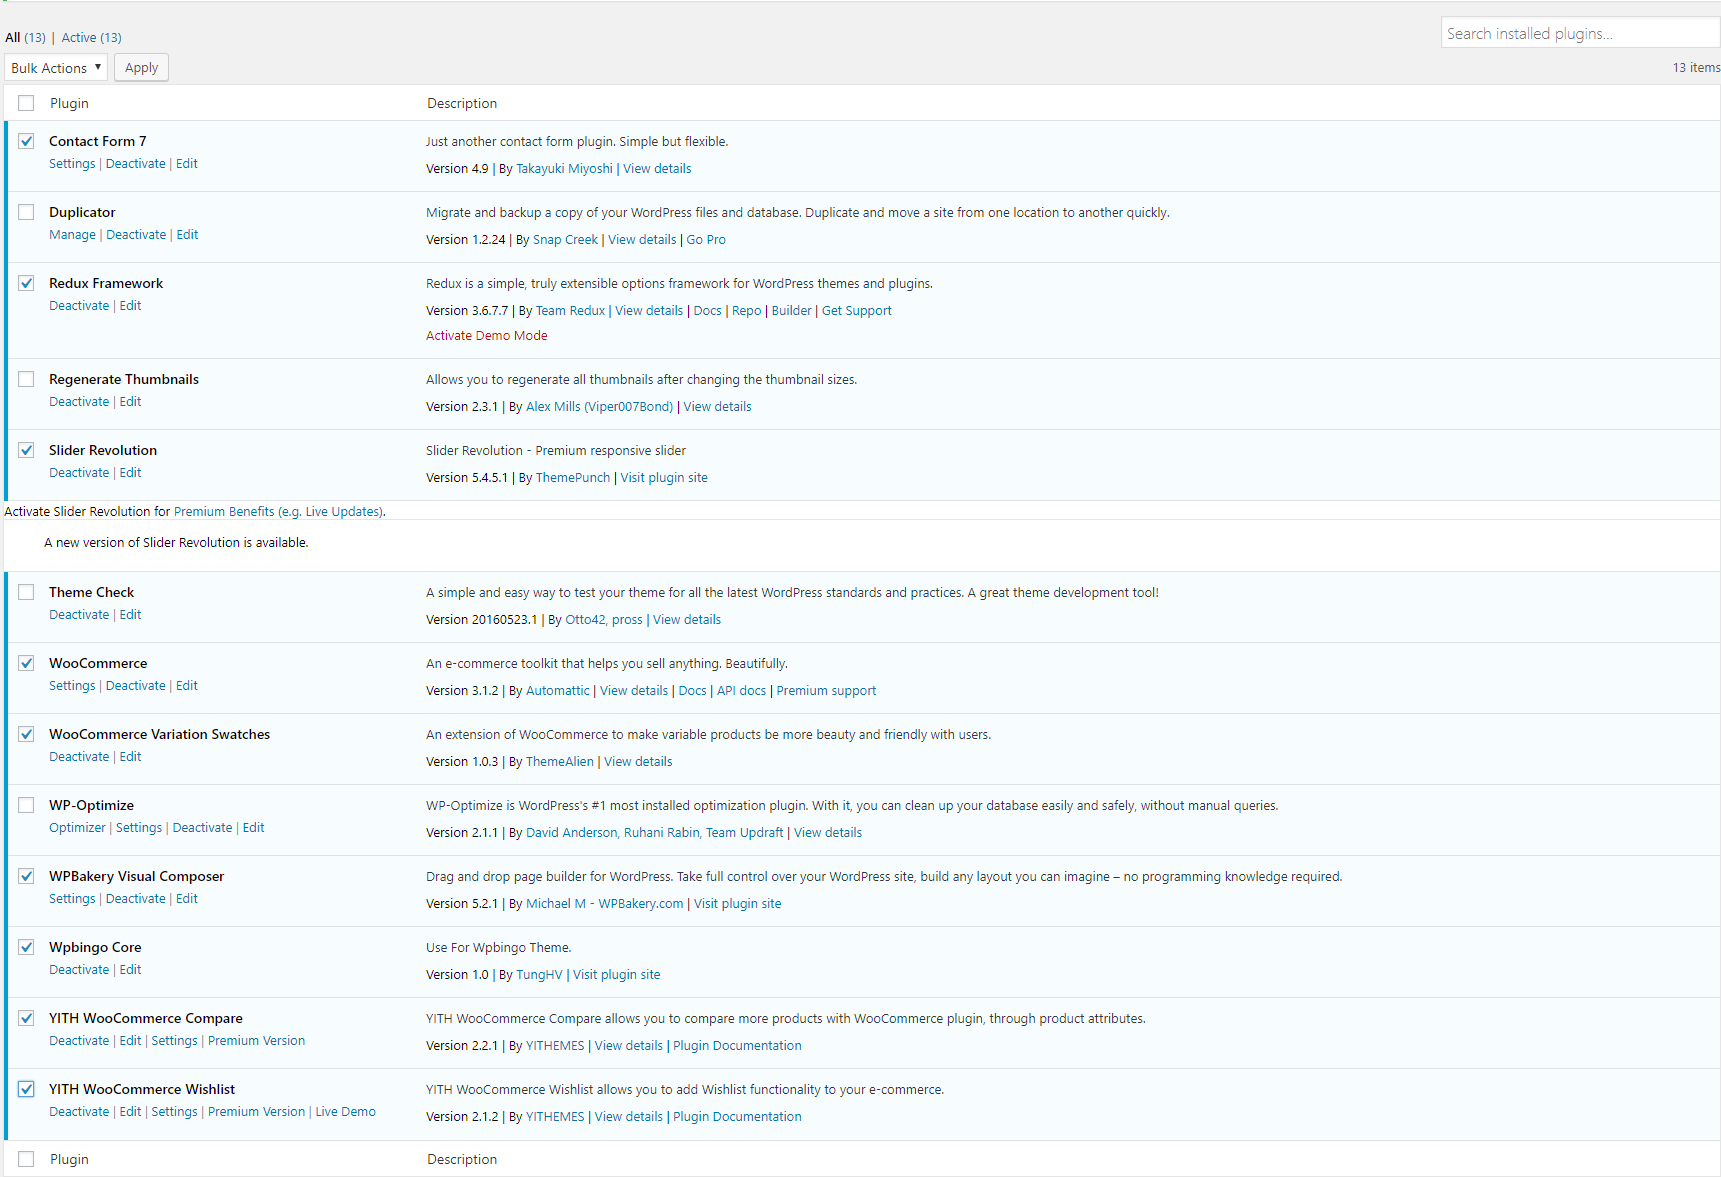
Go to Appearance > Install Plugins and Install/Activate all required plugins:
Import Demo Content
Before installing Demo Content, please install all required plugins, see the list of plugins on: Appearance > Install Plugins (if its not visible, then you have all the required plugins installed). There are 2 ways to import the demo content:
I. One-click Demo Import
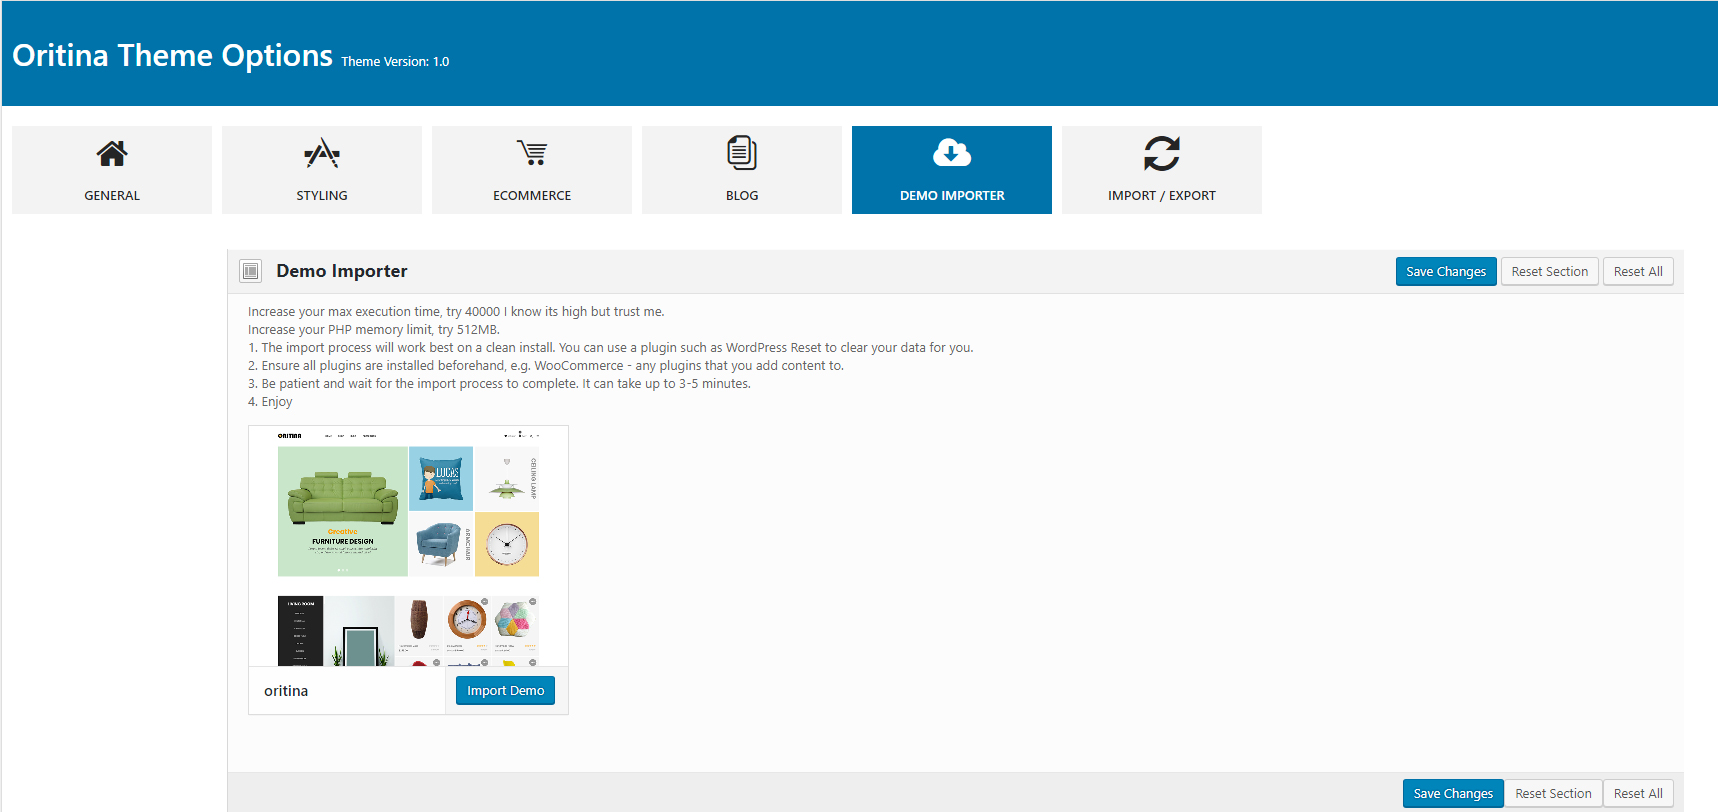
You can quickly import all sample data in Wpbingo Framework > Import Demo Data.
When you access the Oritina Demo Content Importer, you’ll be presented with the option of 2 example sites to choose from. We provide options if you don't want to import full demo Choose the one you like and click 'import' button. It may take a few minutes to finish the process
II. Using WordPress Tool
1. Login to your WordPress admin (/wp-admin) and go to Tools > Import and choose the WordPress system from the list to import.
2. You will see a file chooser input, there you upload the latest version XML file that can be found on Sample Data/sample
3. Click Run & Import
Wpbingo Framework
Please install the 3 plugin WooCommerce, Visual Composer and Redux Framework before installing wpbingo.
I. Footer
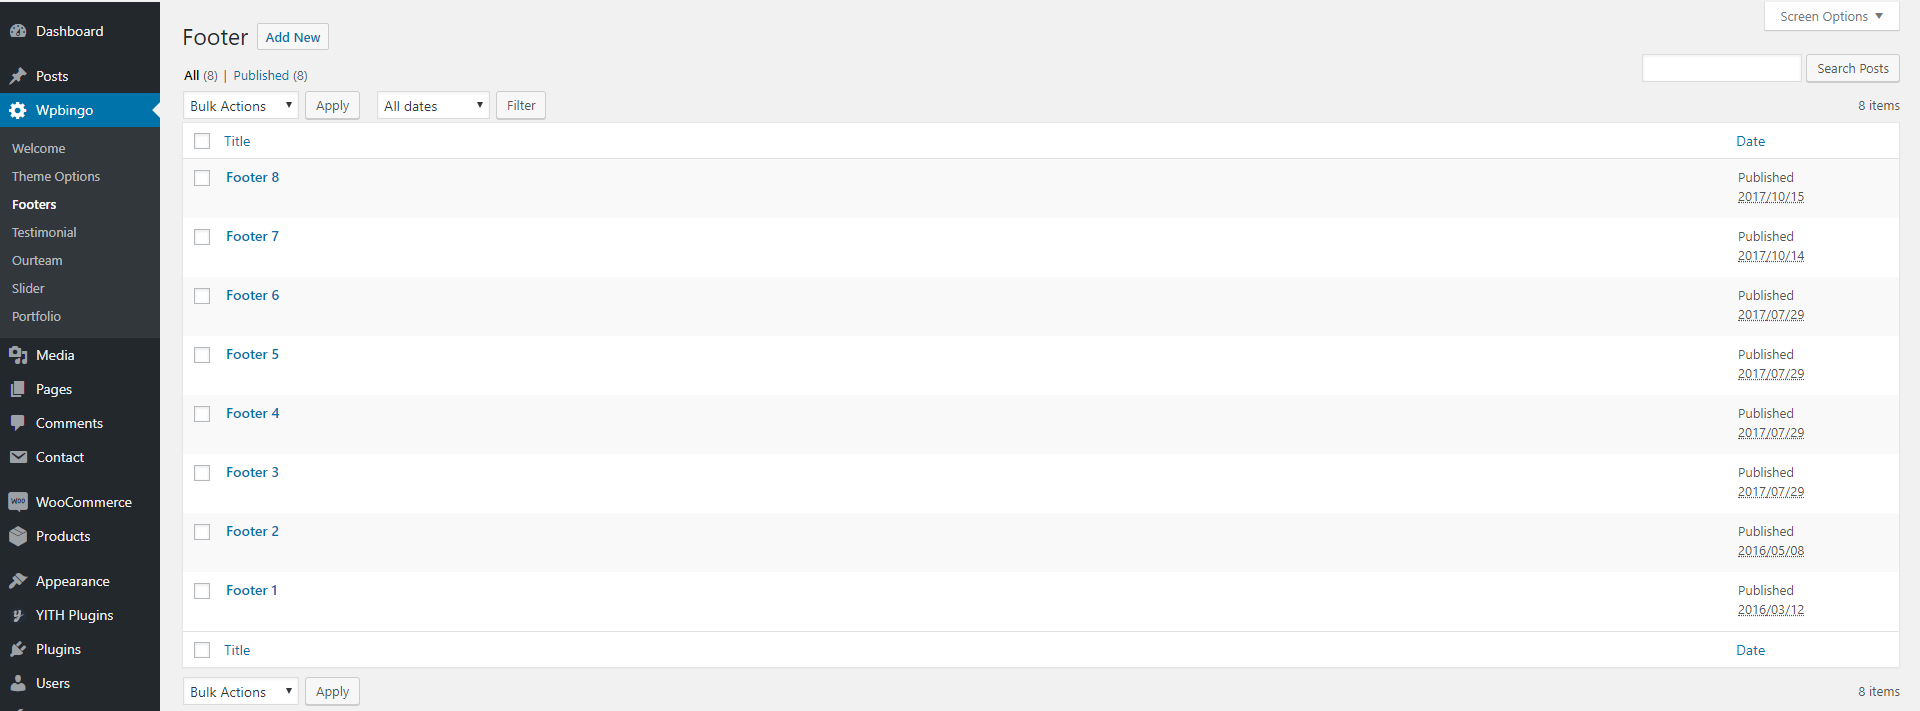
You can manage and create new and select footer in Page Configuration
Wpbingo > Footers
II. Testimonial
You can manage and create new and select testimonial in Page
Wpbingo > Testimonial

III. Ourteam
You can manage and create new and select ourteam in Page
Wpbingo > Ourteam

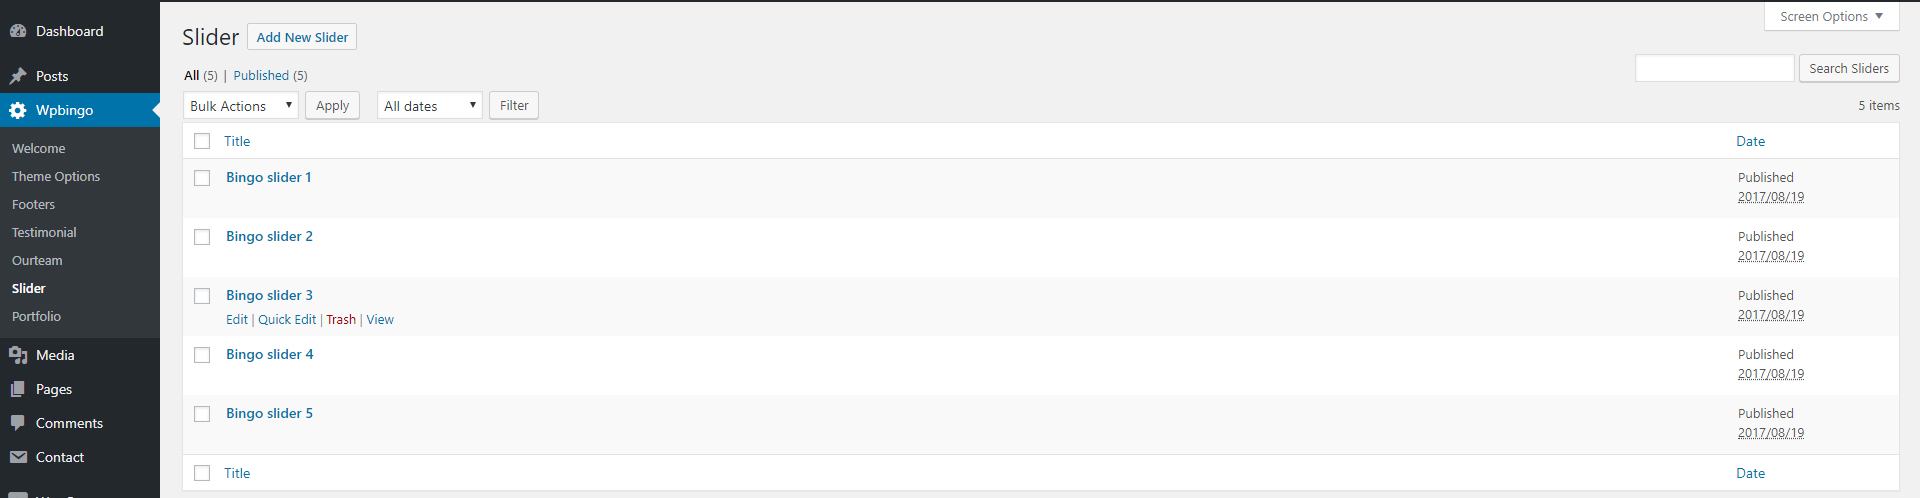
IV. Slider
You can manage and create new and select slider in Page
Wpbingo > Slider
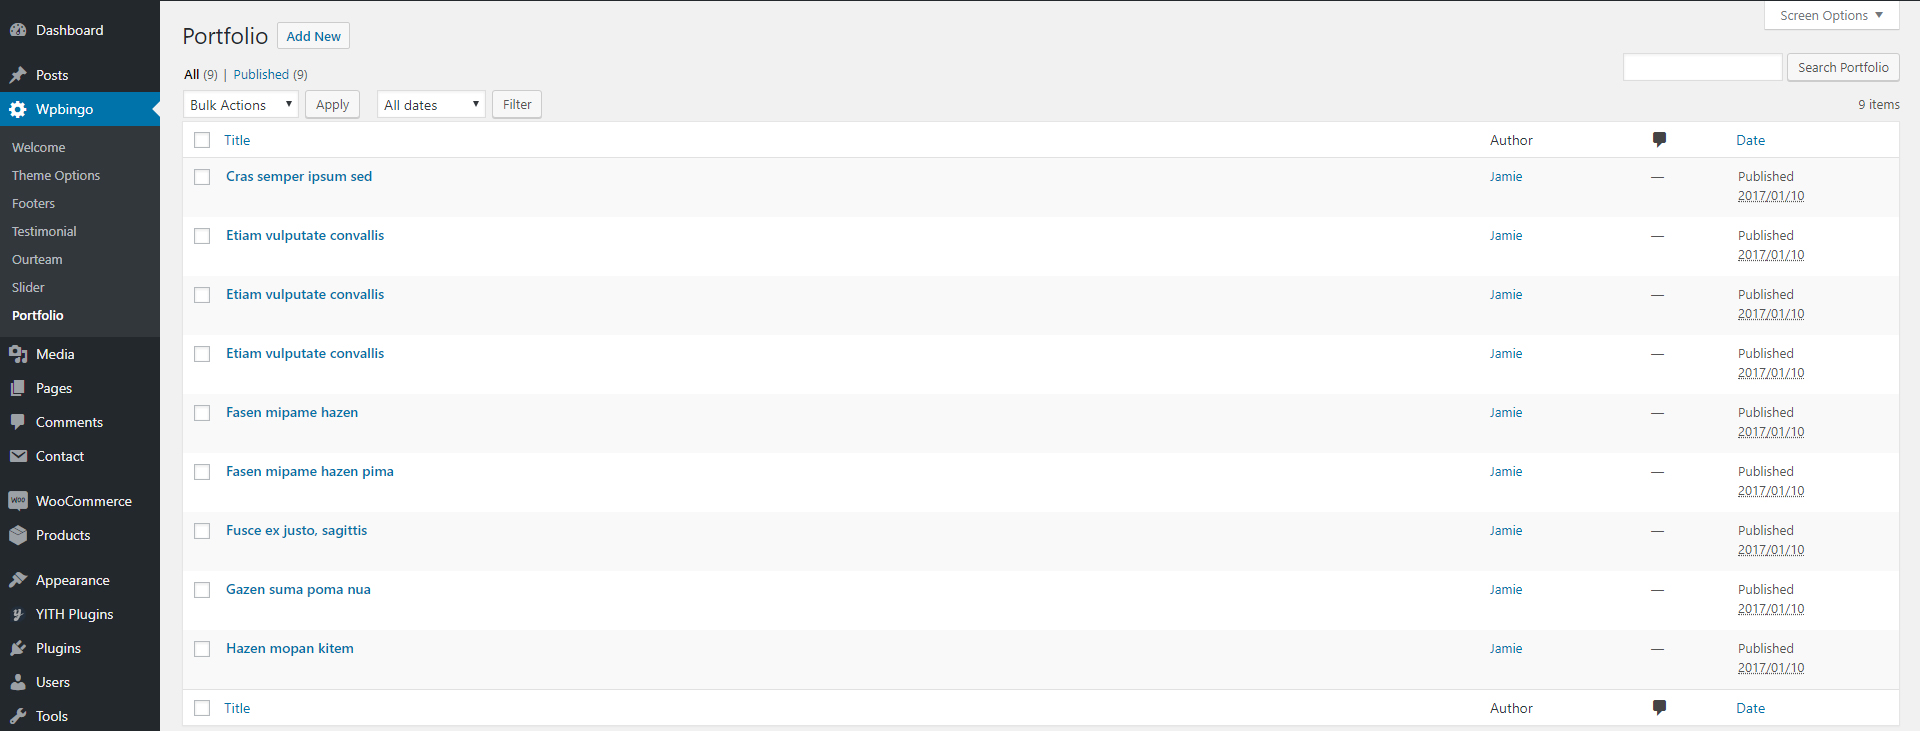
V. Portfolio
You can manage and create new and select portfolio in page Portfolio
Wpbingo > Portfolio
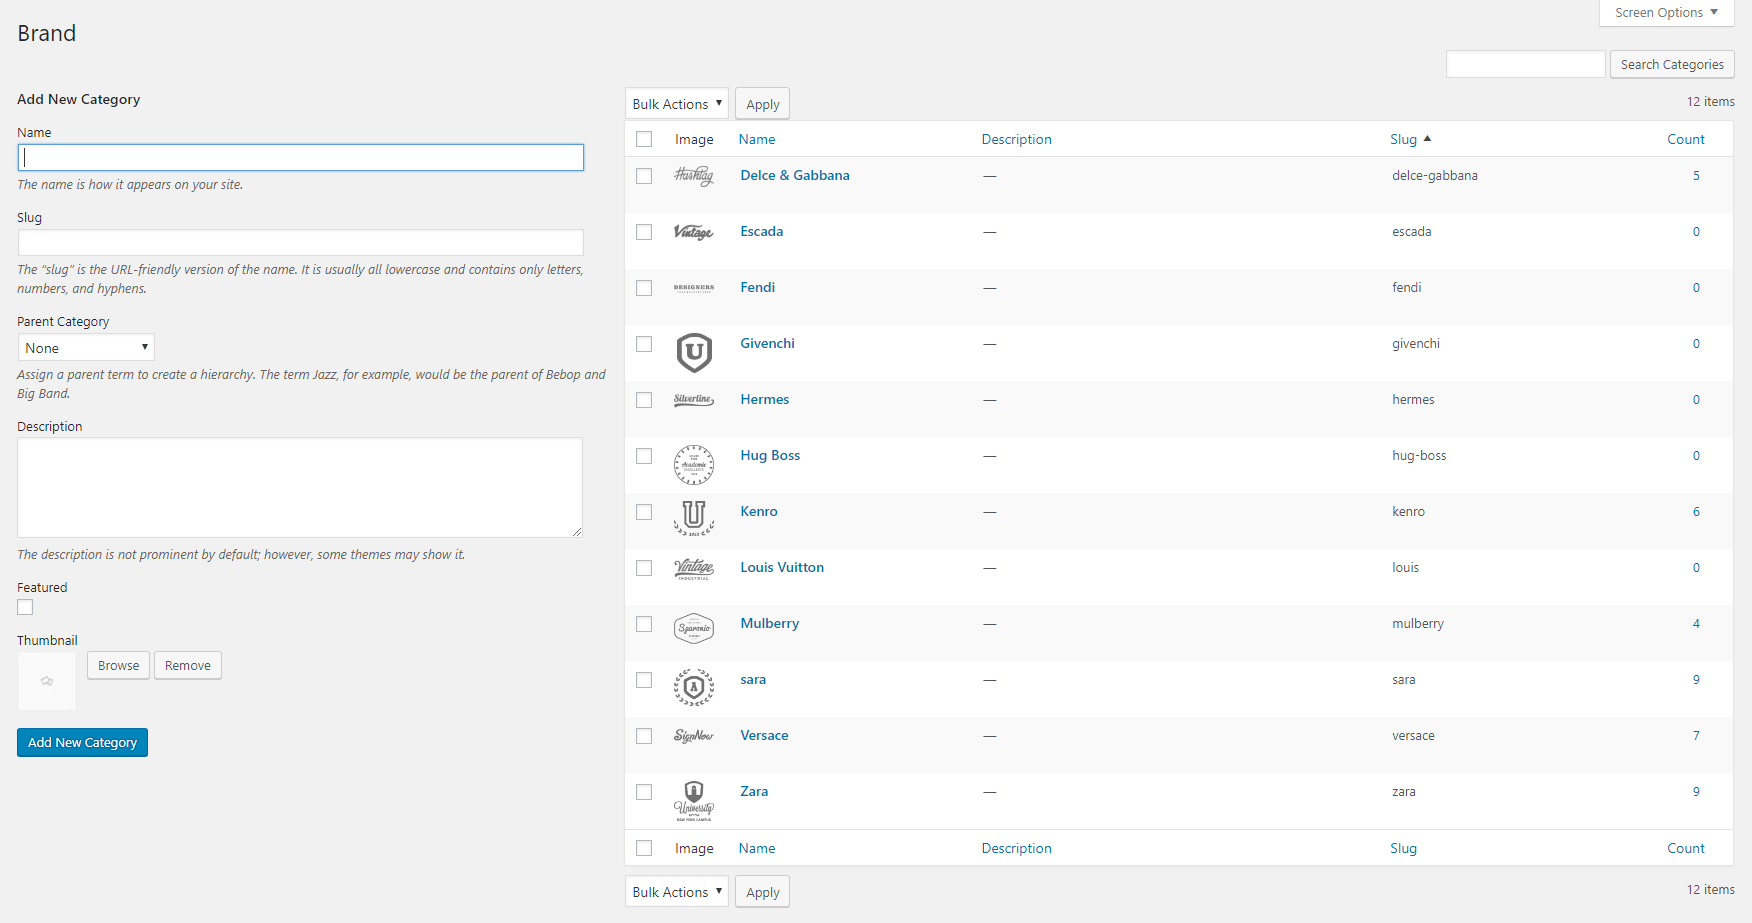
VI. Brand
You can manage and create new and select brand in product
Products > Brand
Theme Options
After the installation is completed, you can customize your store.
Customizing your store lets you add functionality or change your store's appearance without switching themes.
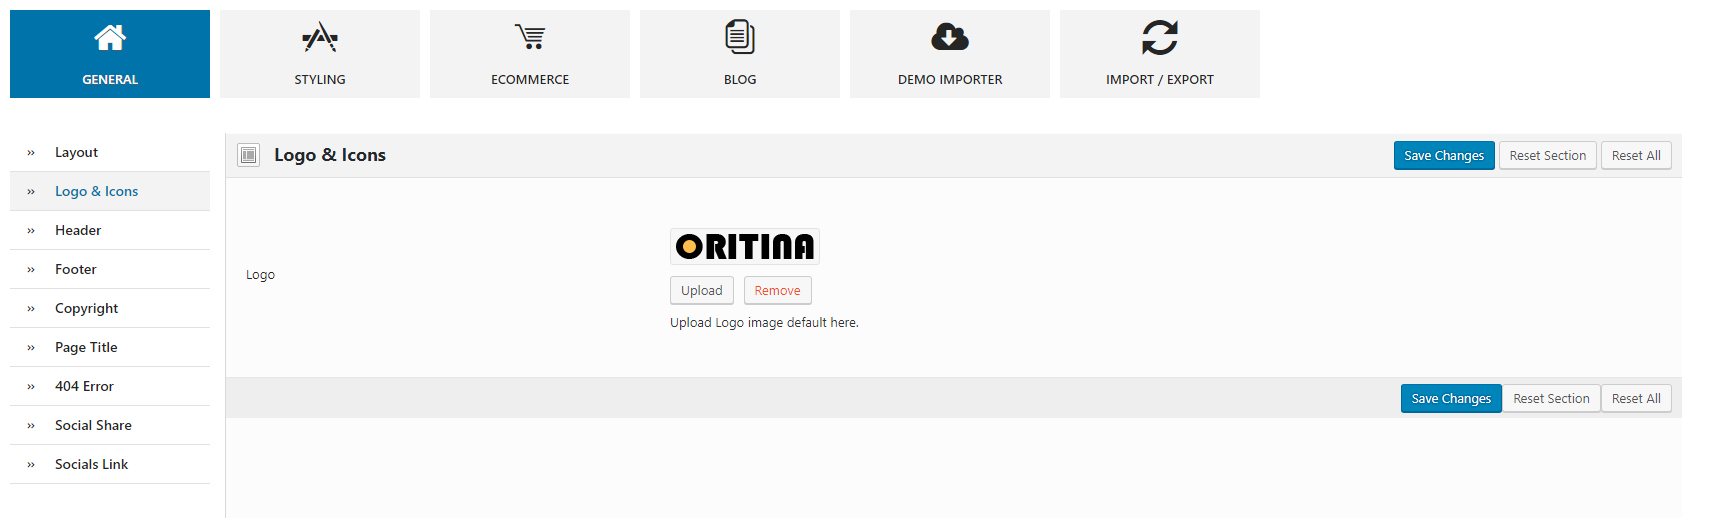
I. Logo
You can change the theme’s logo by accessing the Theme Options and uploading your logo with the uploader under the “Logo, Icons” section:
Wpbingo > Theme Options > Logo, Icons
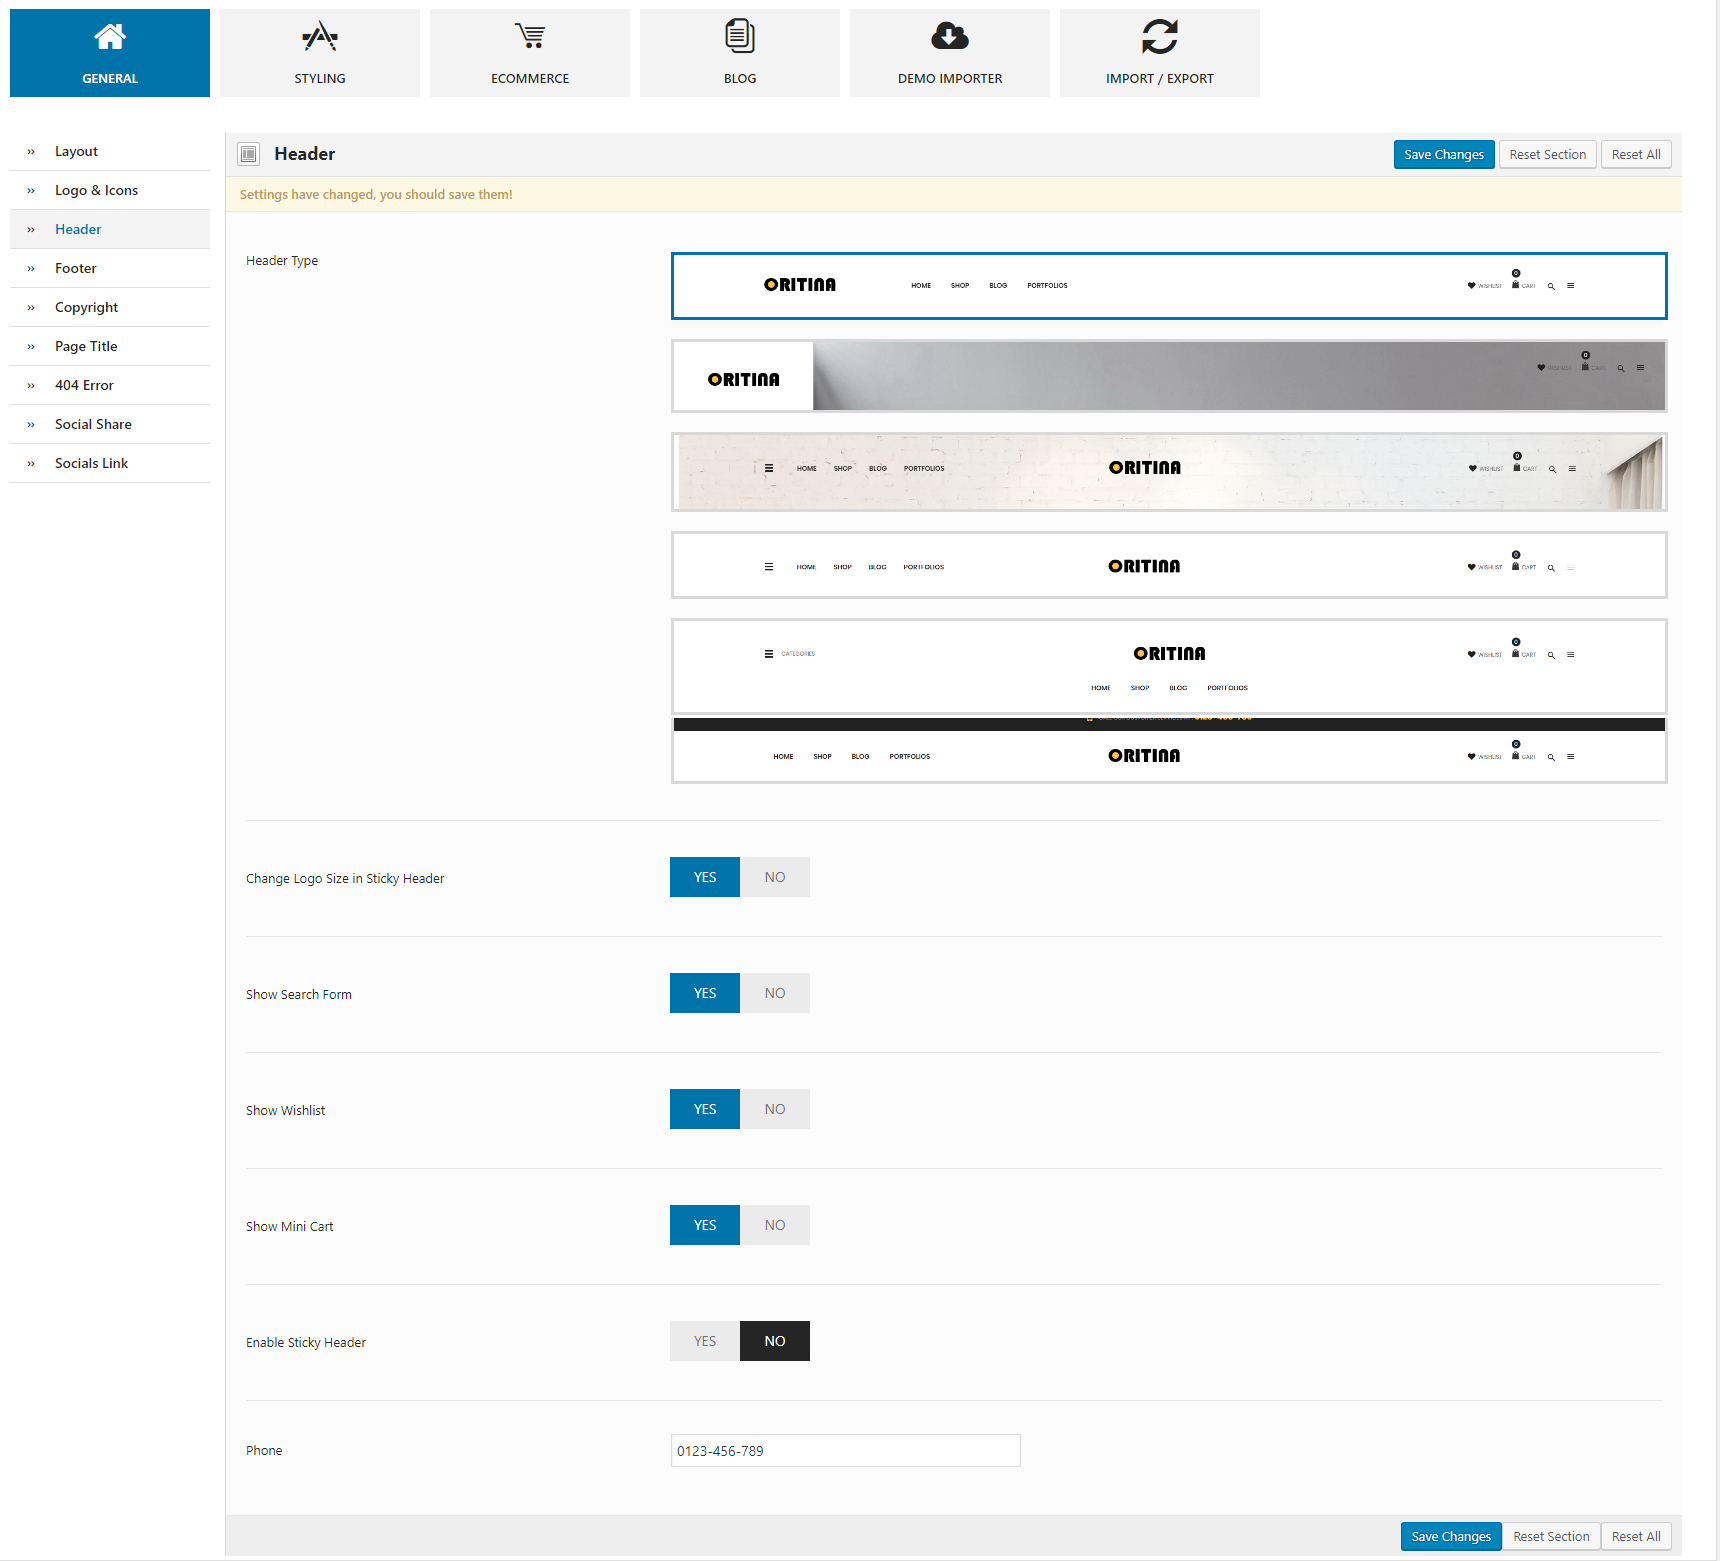
II. Header
4 variations of headers ready to use
1. Access to theme options Wpbingo>Theme Options>Header
2. Click the section Header Types
3. Clicking on any of the header to choose and hit Save Changes
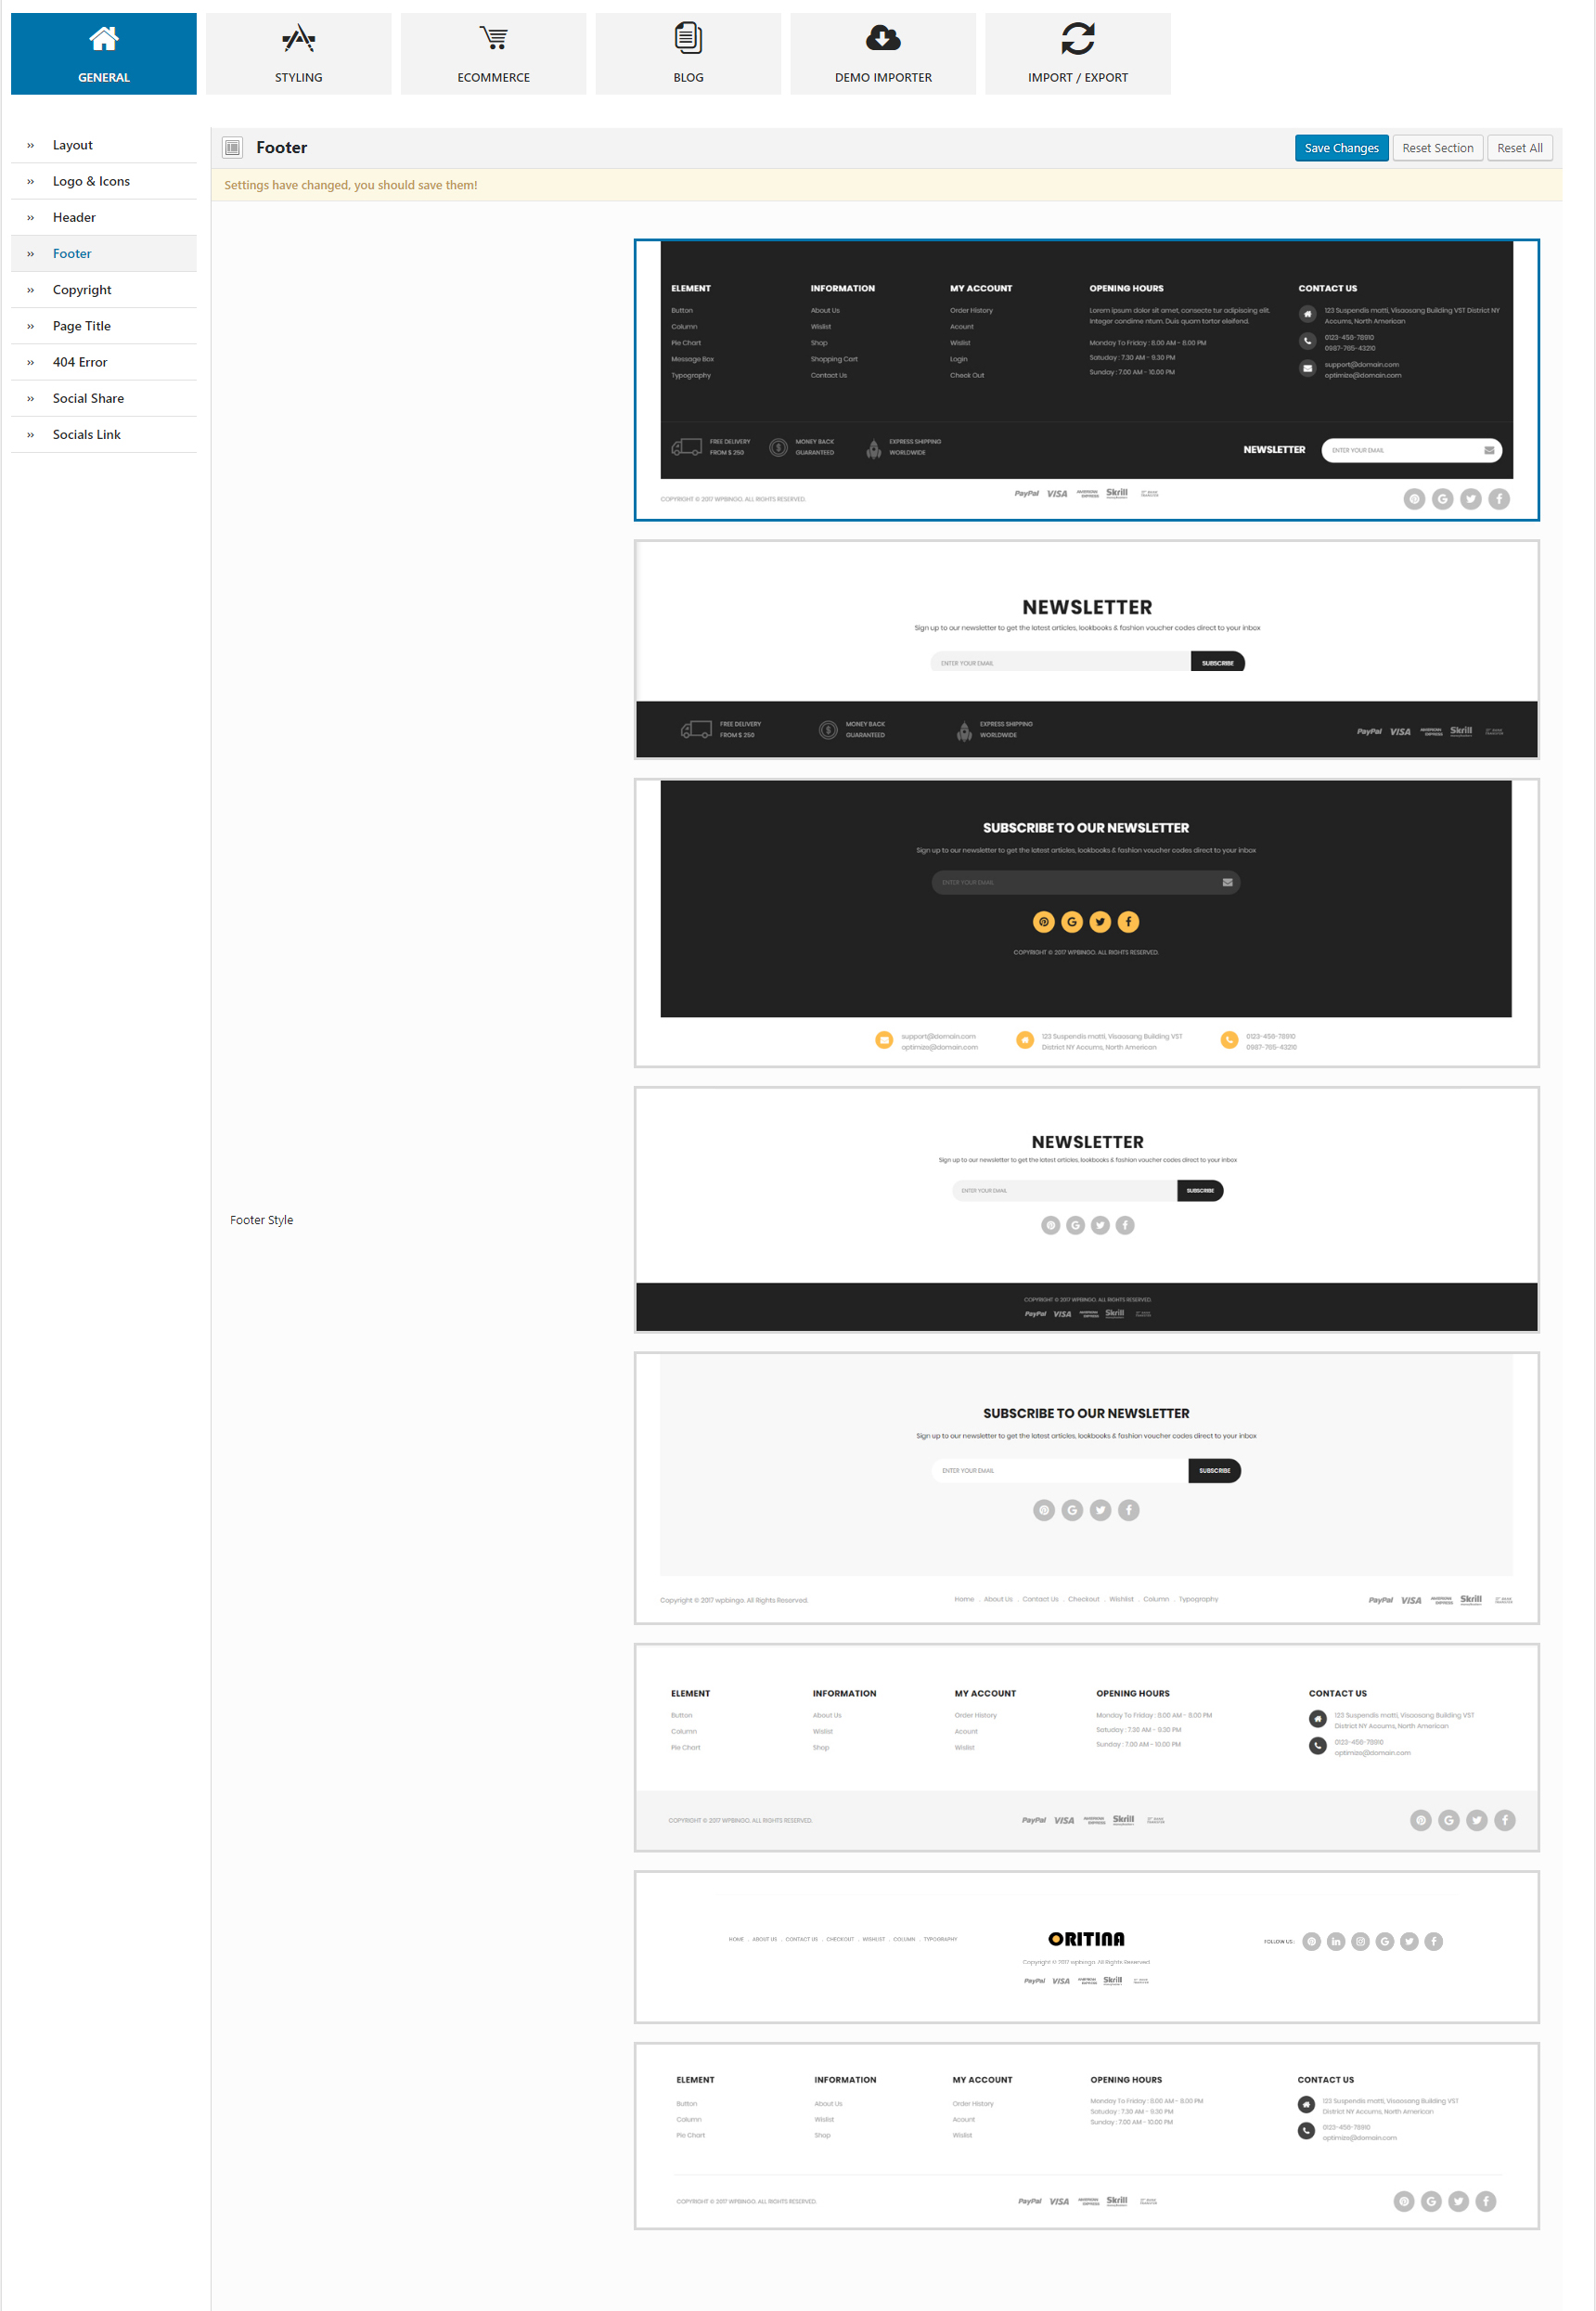
III. Footer
To change the footer:
1. Access to theme options Wpbingo>Theme Options>Footer
2. Click the section Footer Style
3. Clicking on any of the footer to choose and hit Save Changes
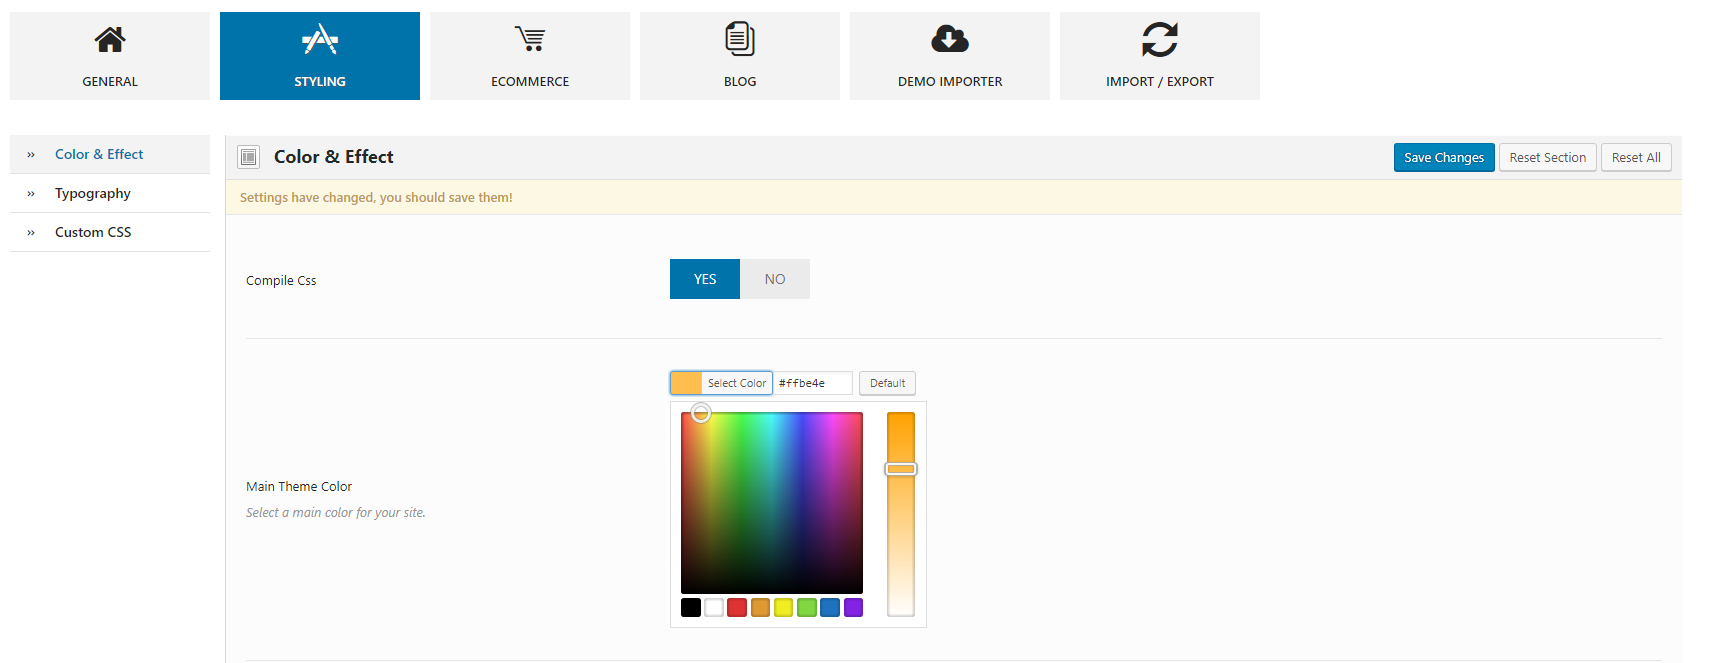
IV. Color Theme
1. Access to theme options Wpbingo>Theme Options>Styling>Color And Effect
2. Click the Compile Css
2. Choose color Main Theme Color
4. Click theSave Changes
Choose a color theme before custom css in the css directory of the theme, to avoid overwriting the file
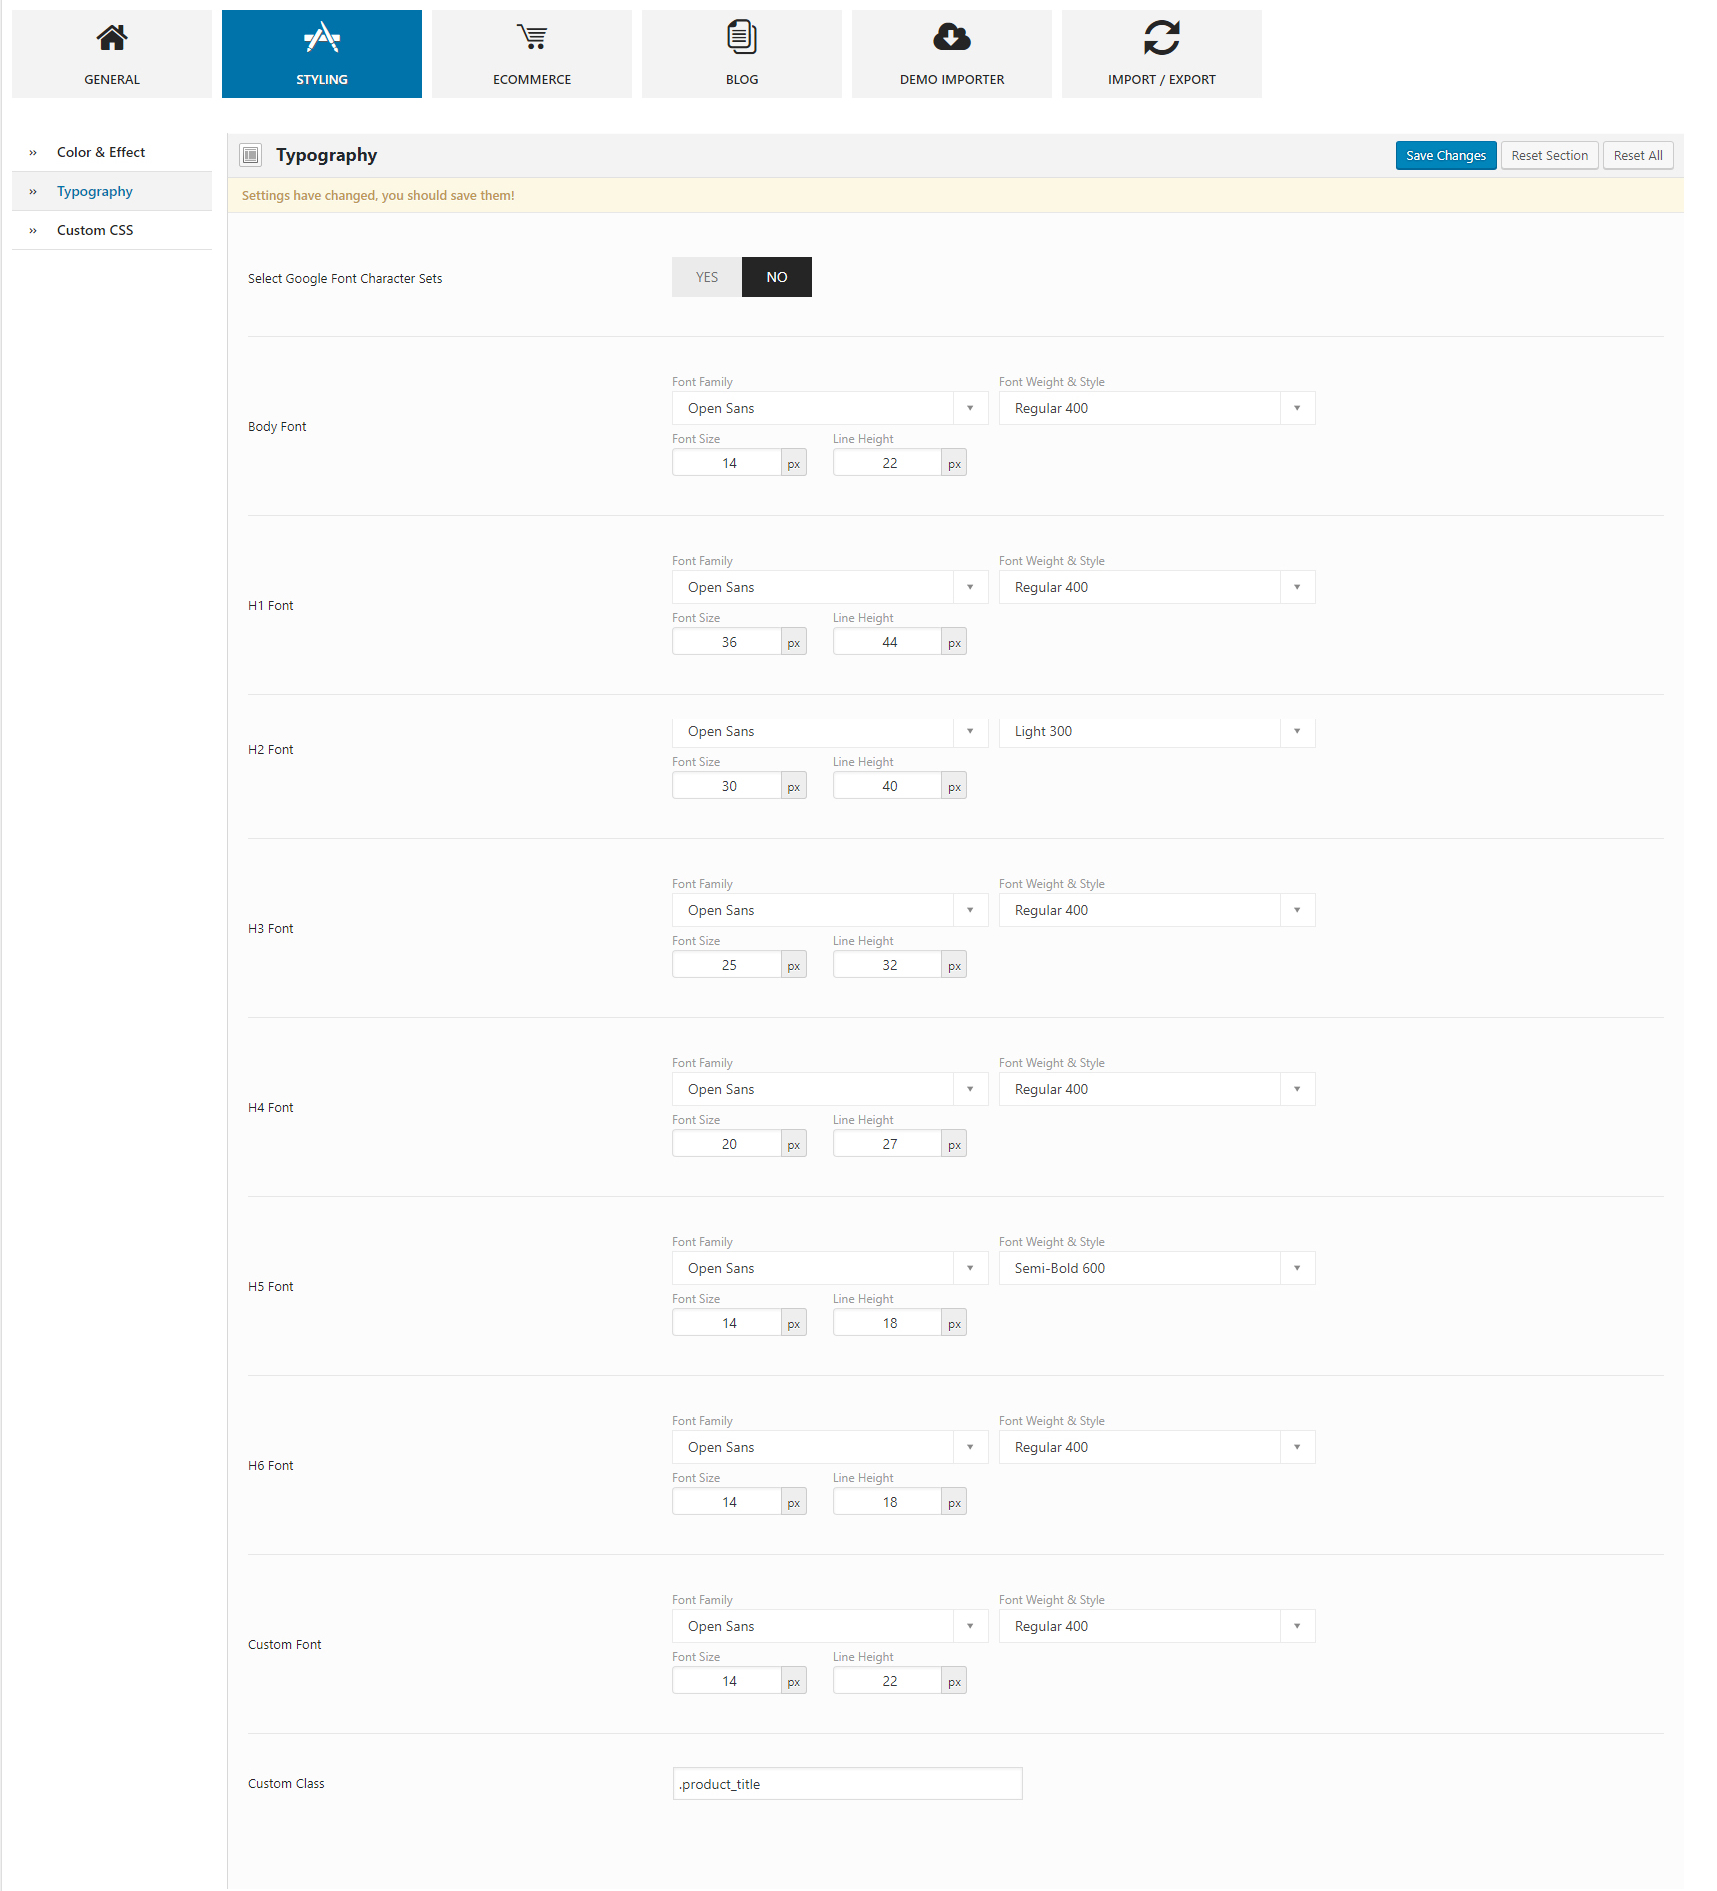
V. Typography
Go to Theme Options Wpbingo>Skin Click the section Typography
Page Configuration
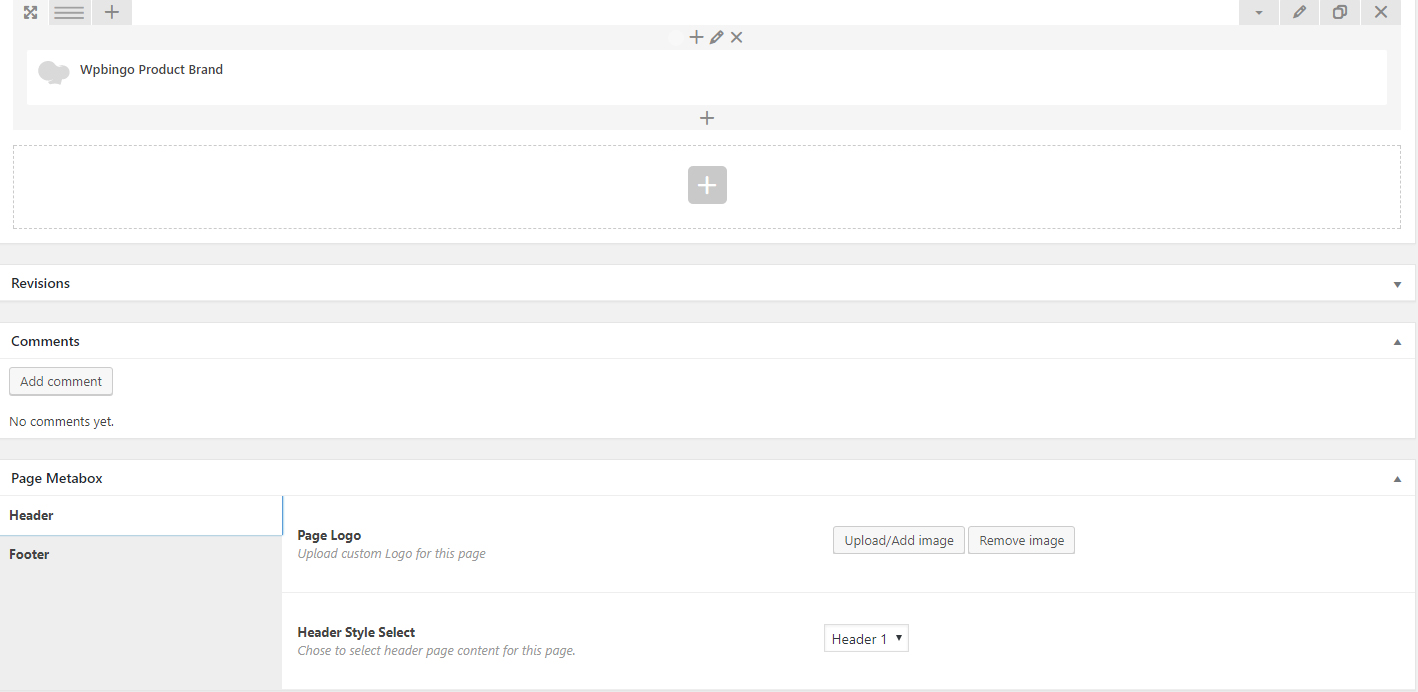
You can customize the footer, header and logo for each page, the config here will be more preferred in theme options
Product Color Swatches
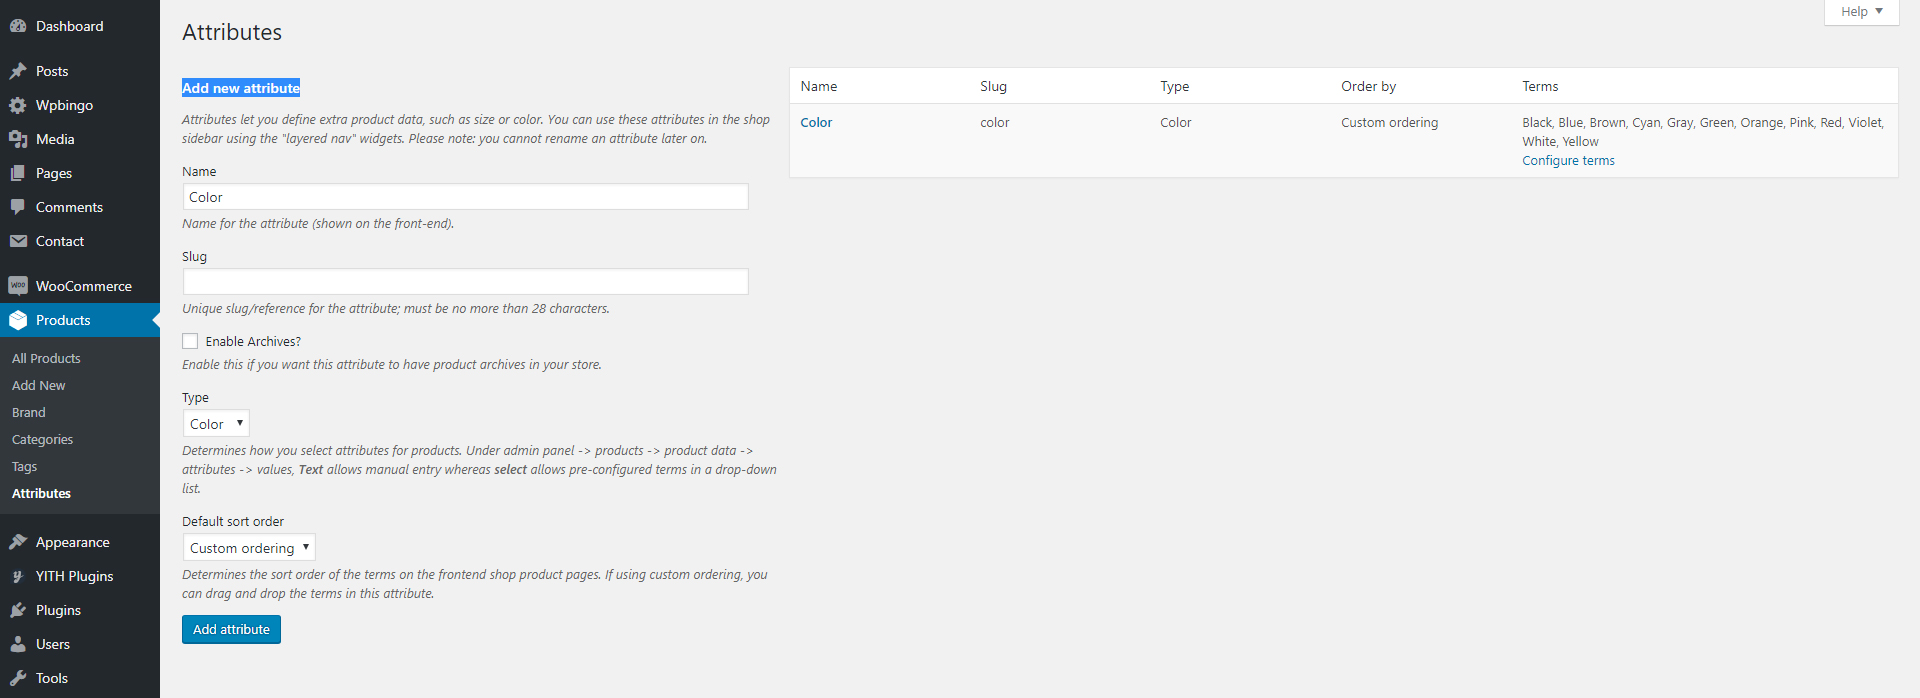
You can add color atribute :
Products > Attributes > Add new attribute> Type->Color
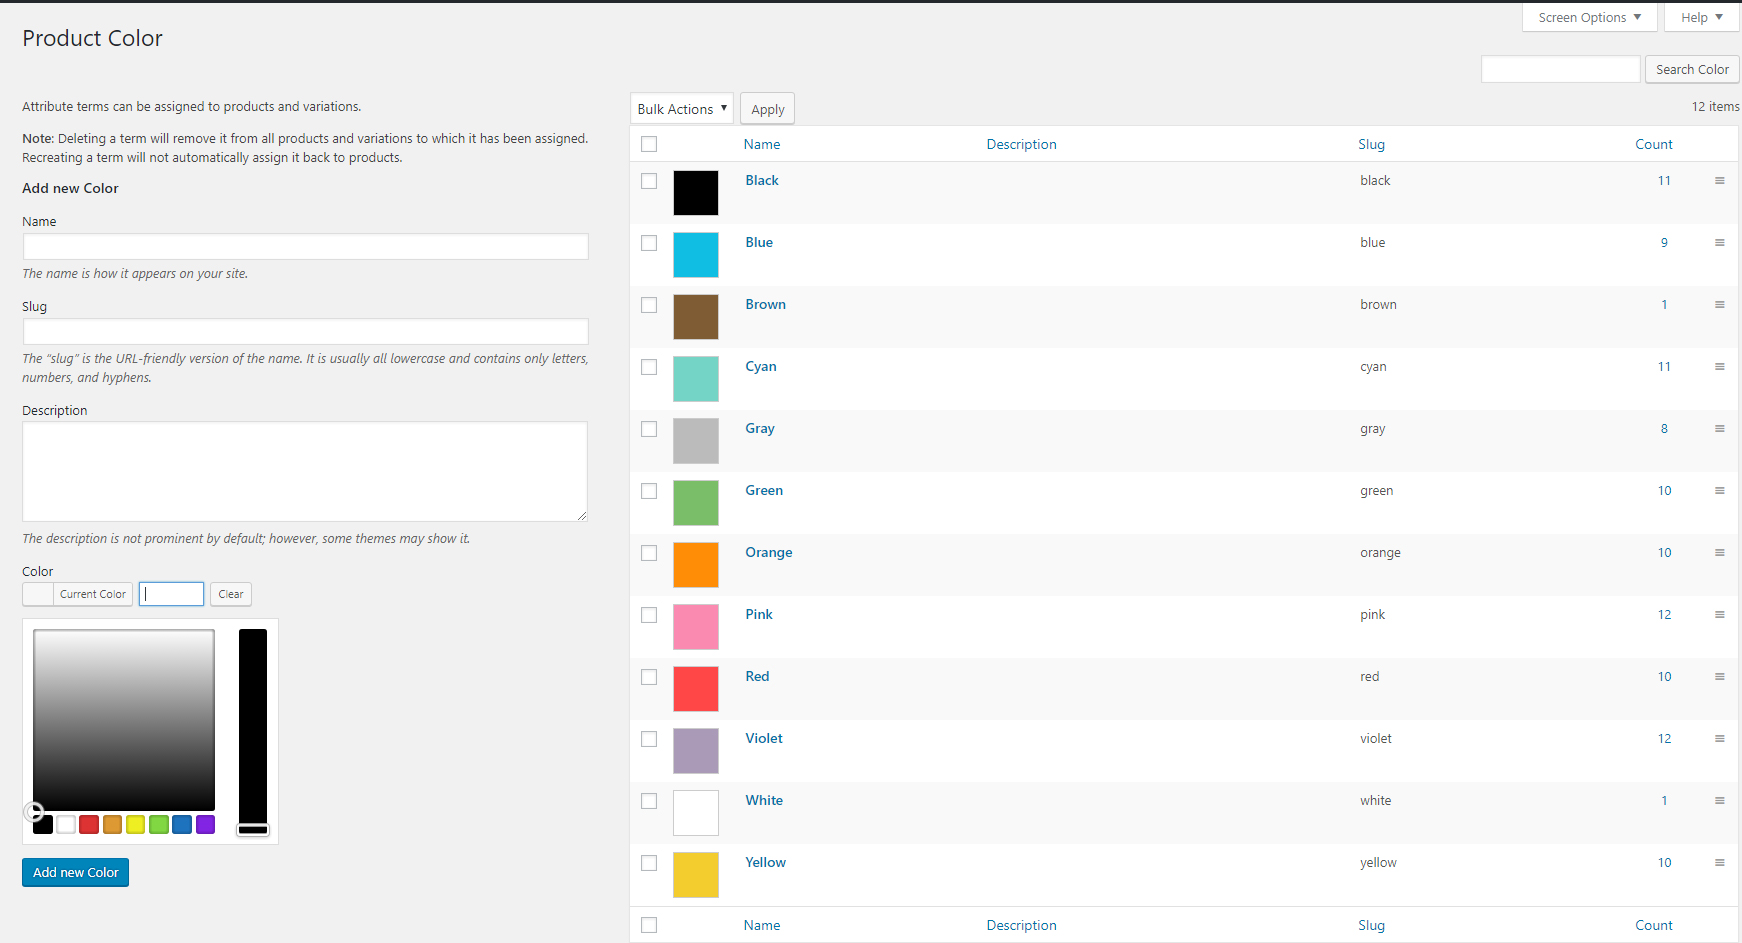
Color > Configure terms > Add new Color
Shop & Products
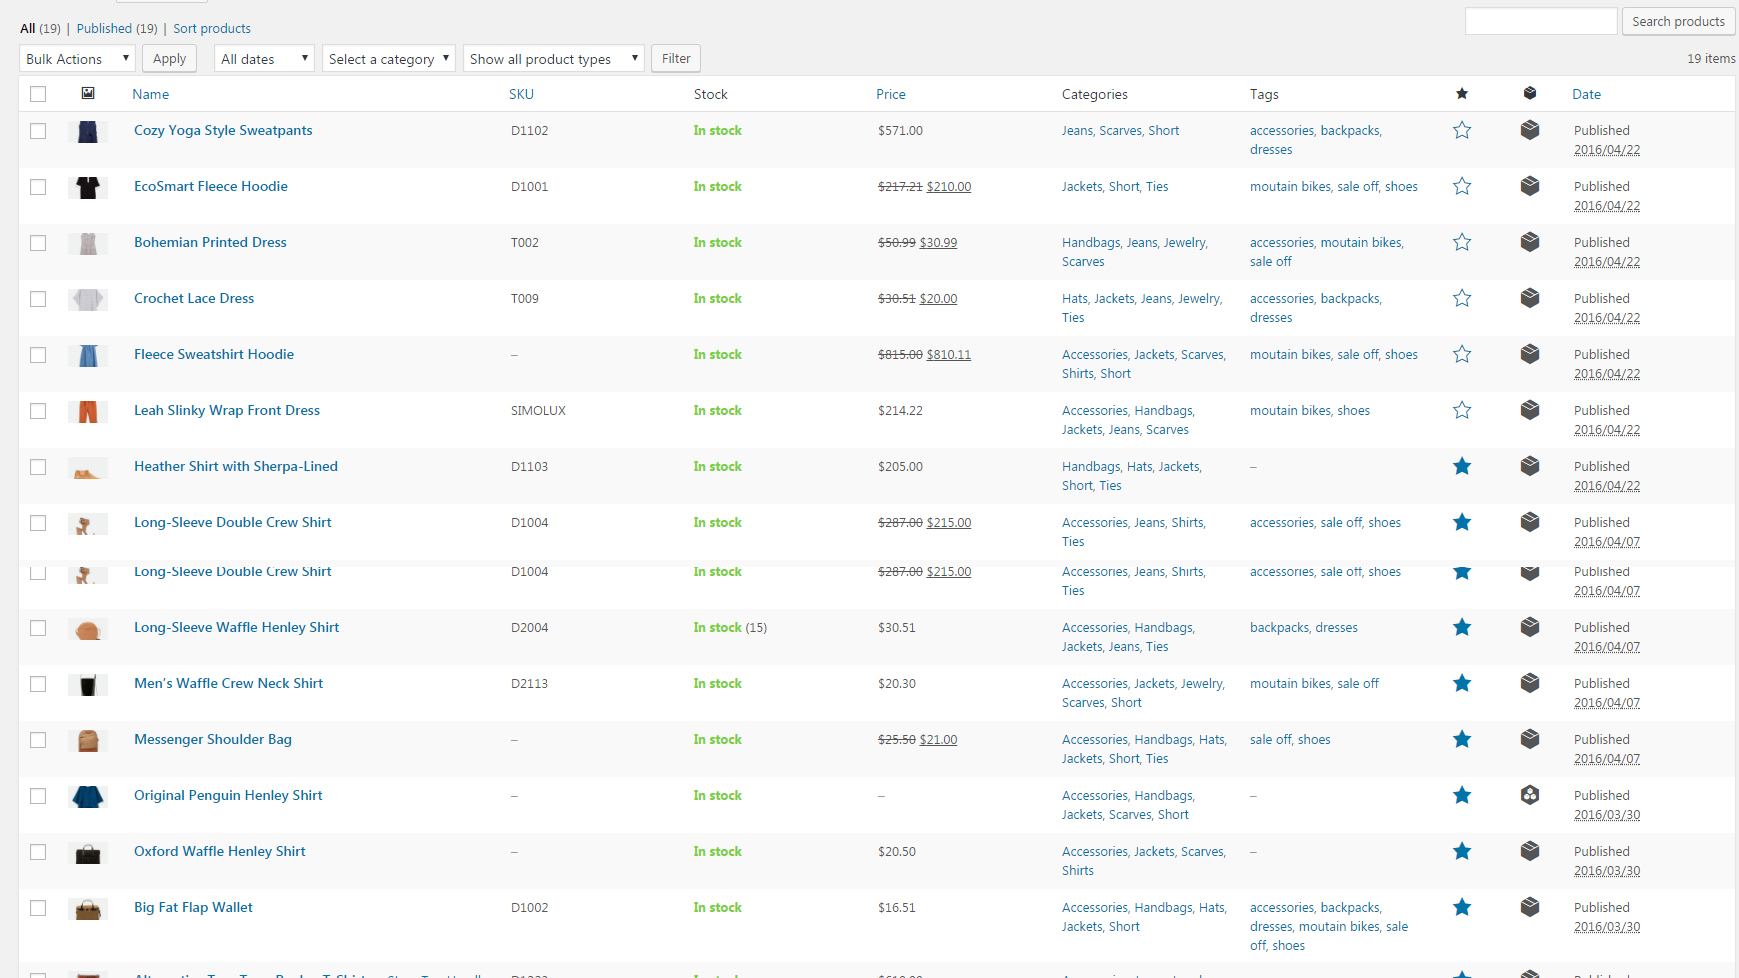
You can find everything related to your shop such as products, brands, categories etc.. in Products menu
I. Add a New Product
Click the menu Products, then click Add New.
After filling in all the detail, click Publish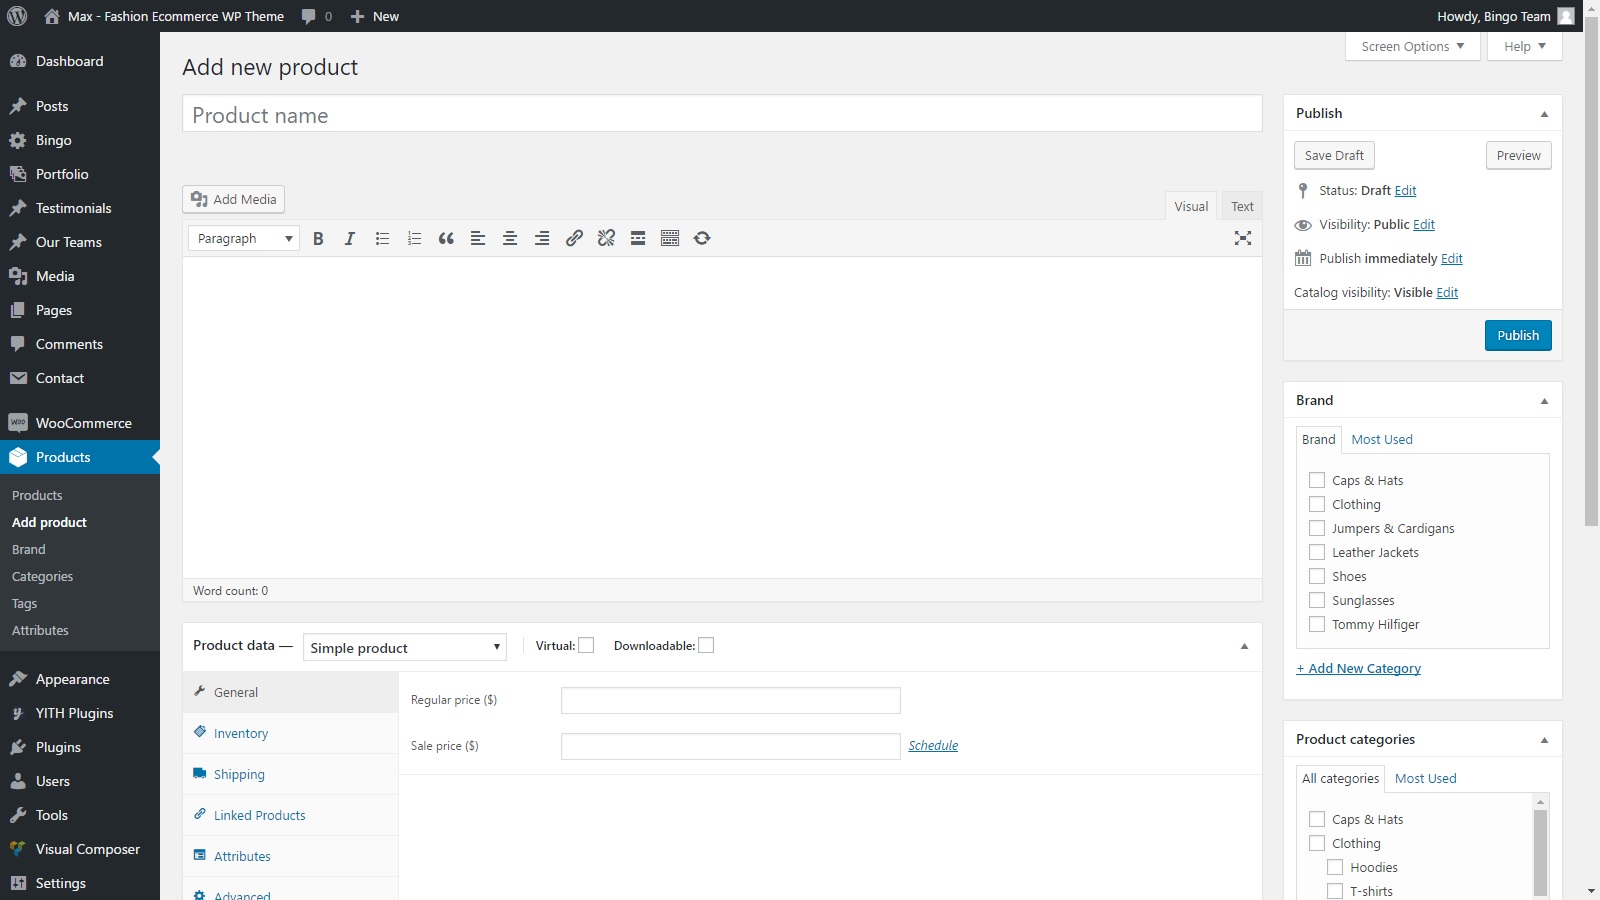
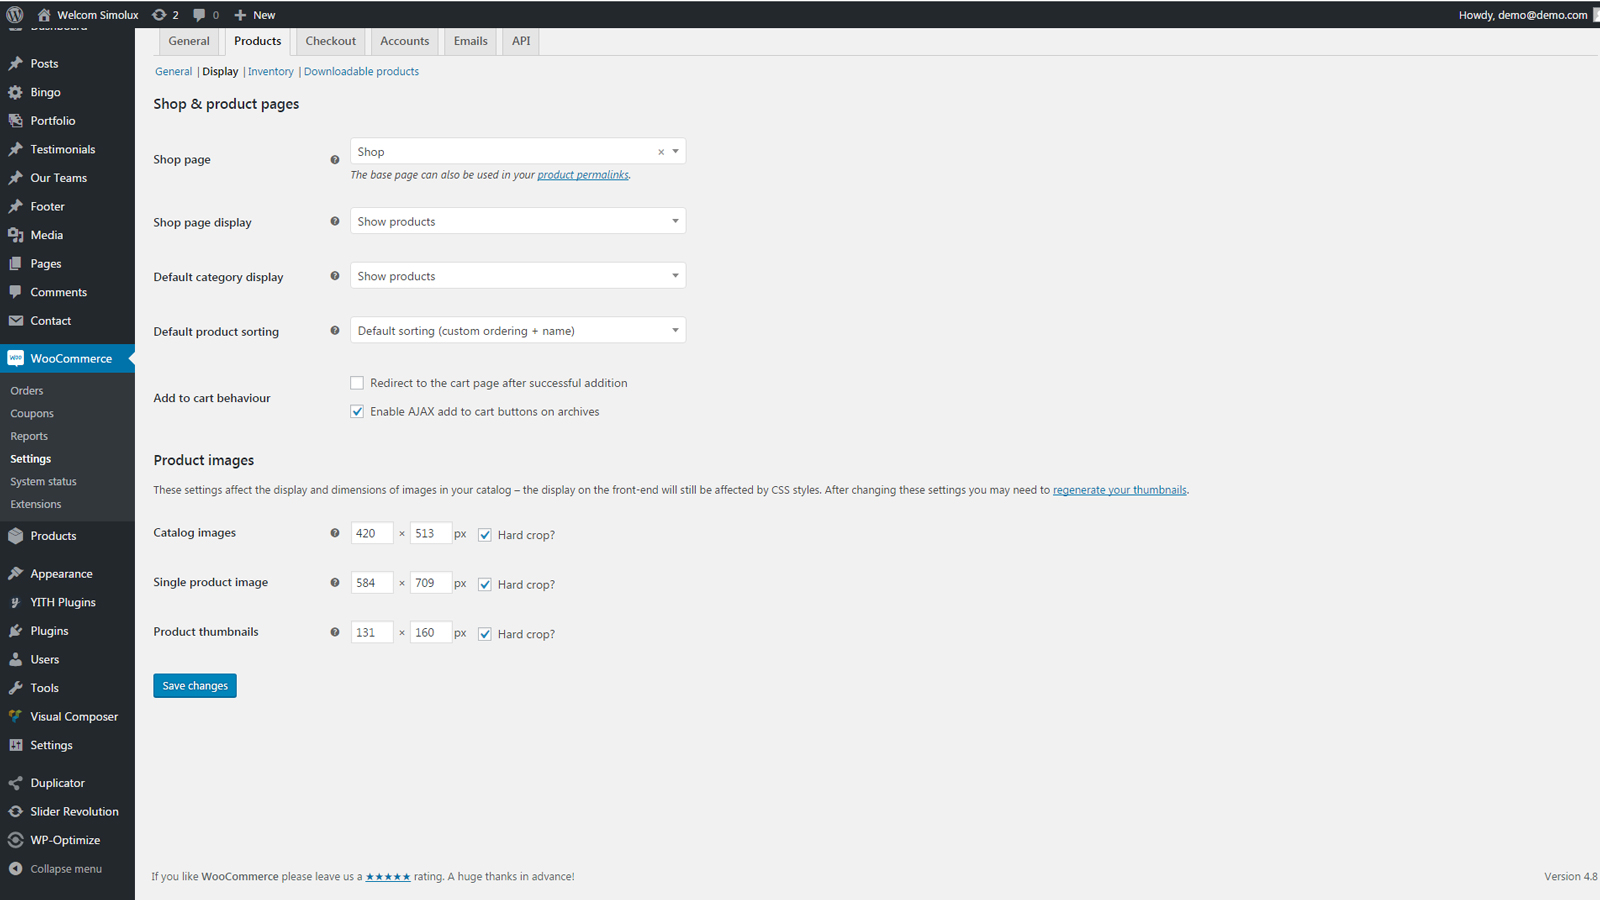
II. Setting The Shop Page
To display your products, you will want to create a page, leave the content blank, and then set the “Product Archive / Shop Page” in WooCommerce > Settings > Products Disply. Here you can select the page, choose whether you show categories or products on the main shop page, the default sorting, and more.
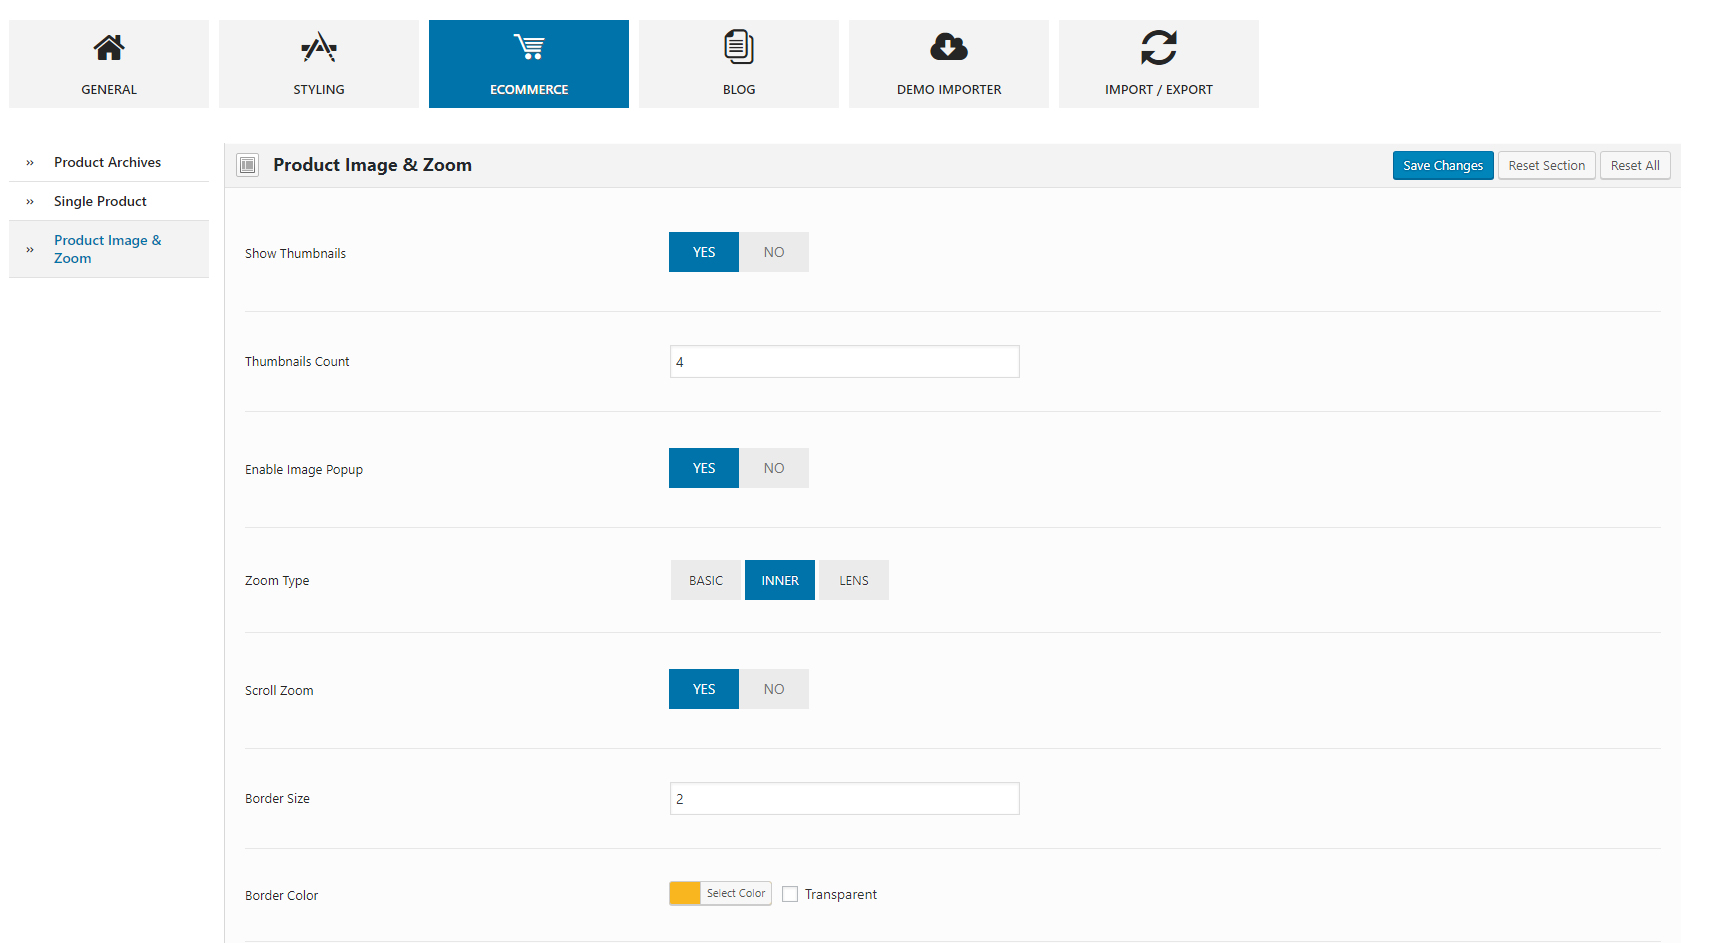
III. Product Image & Zoom
You can find all the options for product image & zoom in Wpbingo > Theme Options > Woocommerce > Product Image & Zoom
Product image zoom functionality is built into the theme as standard, no plugin required. Diffent zoom effect can be changed in 'Zoom Type'
Blog & Posts
Once you’re on the Add New Post screen, you will then be able to set a title for the blog post, add the body content, and also provide all the meta information such as extra details and media. In the blog meta you can set the image for the thumbnail, and also the media type for the detail page.
You can use the Visual Composer to create the content of the item, which effectively allows you to have limitless possibilities for what you can display, and also how you can display it. For more detail, please visit: http://codex.wordpress.org/Writing_Posts
Information
Thank you for reading!
We hope you can create the best website with our themes.
- Email: [email protected]
- Facebook: Wpbingo
- X(Twiter): Wpbingo
- Website: wpbingosite.com